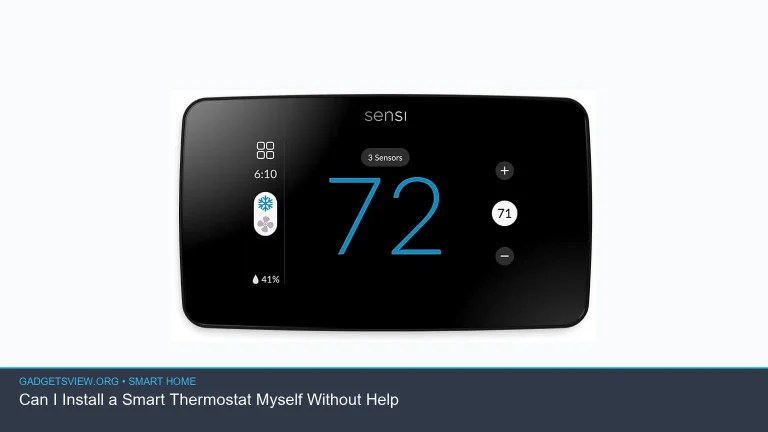
If you need an installation guide for Sensi Lite smart thermostat, this article walks you through the full process in a clear, safe way. You’ll learn how to check compatibility, shut off power, label wires, mount the thermostat, connect it in the app, and troubleshoot common issues. Because smart thermostat wiring can vary by home, the safest approach is to verify your HVAC system and follow both the thermostat instructions and your equipment manual. Use this guide as a practical overview before you start, and pause if anything in your wiring looks unclear.
📖 Table of Contents
📌 Key Takeaways
- Check HVAC compatibility first, especially whether your system needs a C-wire or another power setup.
- Turn off power at the breaker before touching any thermostat wires.
- Label each wire before disconnecting it so installation and setup stay simple.
- Use the app setup to finish calibration, Wi-Fi connection, and system testing after mounting.
Before You Start: What to Check
Before you begin the installation guide for Sensi Lite smart thermostat, take a few minutes to inspect your current setup. The goal is to make sure the thermostat is compatible with your heating and cooling system and that you have the tools to finish the job without guesswork. If your home has an unusual system, heat pump, multi-stage equipment, or unclear wiring, verify details with the product instructions or a licensed HVAC professional.
You should also confirm whether your old thermostat has a C-wire or another power source available. Many smart thermostats need steady power to run reliably, so this step matters before you remove the old unit. If you are unsure what a wire does, do not guess. A wrong connection can damage the thermostat or affect your HVAC system.
Tools you may need
- Phillips screwdriver
- Small level, if needed for mounting
- Masking tape and a pen for wire labels
- Phone or tablet for app setup
- Flashlight for low-light thermostat locations
How to Install Sensi Lite Smart Thermostat
Most smart thermostat installs follow the same basic flow: cut power, document the old wiring, mount the base, attach wires, and finish setup in the app. The steps below keep the process organized and reduce the chance of mistakes. Work slowly, and stop if anything does not match the labels or instructions.
- Turn off power at the breaker. Switch off the HVAC system at the breaker panel. This is the most important safety step before removing any thermostat cover.
- Remove the old thermostat cover. Gently pull off the faceplate or remove the cover screws, depending on the model you have.
- Take a clear photo of the existing wiring. Photograph the wire positions before touching anything. This gives you a backup reference if a label falls off.
- Label each wire. Use tape and write the terminal letter on each wire as you remove it.
- Remove the old baseplate. Once the wires are labeled, detach the old wall plate from the wall.
- Mount the new thermostat base. Hold the base against the wall, level it if needed, and secure it with screws.
- Connect the wires to the correct terminals. Insert each wire into the matching terminal as directed by the wiring guide for your system.
- Attach the thermostat faceplate. Snap or mount the thermostat securely onto the base.
- Restore power. Turn the breaker back on after confirming the wires are seated correctly.
- Complete app setup. Follow the on-screen steps to connect Wi-Fi, name your thermostat, and test heating and cooling.
If your old thermostat used batteries only, your setup may still need a different power arrangement once you switch to a smart model. Do not assume the old setup is enough. Verify the wiring method in the setup instructions before moving forward.
Wiring Basics and Common Cautions
Thermostat wiring is usually straightforward when the labels are clear, but small differences matter. A wire that powers cooling on one system may not be used the same way on another. That is why the photo you take before removal is so useful.
Pay close attention to loose, corroded, or very short wires. If a wire is too short to reach the new base, do not stretch it hard. If insulation is damaged or the wire seems brittle, stop and have it checked before continuing.
Common cautions to keep in mind
- Do not work on live thermostat wiring.
- Do not place bare wire ends where they can touch each other.
- Do not force a wire into a terminal that does not match the label.
- Do not skip the app setup, since that is where many thermostats finish configuration.
If your system uses accessories like a heat pump or auxiliary heat, follow the exact wiring map from the thermostat instructions. Those setups often need more attention than a basic single-stage system. When in doubt, it is better to pause than to guess.
App Setup and First-Time Testing
After installation, the app setup is where the thermostat becomes smart. This is usually where you connect to Wi-Fi, name the thermostat, and choose whether the system controls heating, cooling, or both. You may also be asked to confirm equipment type so the thermostat can behave correctly.
Once setup is complete, test the system in small steps. Start with heat, then cooling, and listen for the HVAC equipment to respond. If the thermostat powers on but the system does not start, check the wire seating, app settings, and breaker status before trying again.
Quick test checklist
- Does the display power on normally?
- Does Wi-Fi connect without errors?
- Does heating start when you raise the set temperature?
- Does cooling start when you lower the set temperature?
- Does the system shut off when you return to the current room temperature?
Troubleshooting Table for Common Installation Issues
Most installation problems are simple to trace once you know where to look. Use the table below to narrow down the issue before you assume something is broken.
| Issue | Likely Cause | What to Check |
|---|---|---|
| Thermostat will not power on | Breaker off, loose wiring, or missing power source | Breaker status, wire seating, terminal match, C-wire or equivalent setup |
| Heat or cooling does not start | Incorrect terminal connection or app equipment setting | Wire labels, terminal placement, system type in the app |
| Wi-Fi setup fails | Network issue or weak signal | Wi-Fi password, router proximity, phone connection status |
| System cycles oddly after install | Incorrect configuration or partial wire contact | Wire firmness, app setup, and heating/cooling settings |
If the thermostat still does not behave correctly after these checks, stop and review the installation steps from the beginning. Rechecking the wire labels and terminal connections often solves the problem quickly. If the issue persists, professional help may be the safest next step.
How to Decide If This Is a DIY Job or a Pro Job
Many homeowners can handle a basic thermostat swap if the wiring is clear and the HVAC system is standard. The job becomes harder when there are extra wires, unusual terminal labels, or a system that is not easy to identify. A careful DIY install is fine when you are confident and patient.
Choose a professional if the system is older, the wiring is damaged, the labels are missing, or you are dealing with heat pump, multi-stage, or accessory control that you do not understand. The thermostat is a control device, but it still affects your heating and cooling system. If safety or system compatibility feels uncertain, professional installation is the better call.
Who should choose what
- DIY install: Clear labels, simple wiring, and a standard HVAC setup.
- Professional install: Unknown wires, damaged wiring, complex HVAC equipment, or any situation where power or configuration is unclear.
FAQ
Do I need to turn off power before installing a smart thermostat?
Yes. Turn off power at the breaker before touching thermostat wires. This is the safest way to avoid shock and prevent damage to the thermostat or HVAC control board.
What if I do not know what the wires mean?
Stop and document everything before disconnecting anything else. Take photos, label the wires, and compare them carefully with the installation instructions. If the wiring still does not make sense, ask a qualified HVAC technician.
Can I install it if my old thermostat did not use a C-wire?
Possibly, but you need to verify the exact power requirements for your setup. Smart thermostats often need steady power, so compatibility matters more than the appearance of the old thermostat.
Why does the thermostat turn on but the HVAC system does not respond?
This usually points to a wiring, configuration, or system-type issue. Check that each wire is seated correctly, confirm the app settings, and make sure the thermostat is set for the right equipment type.
How do I know if the installation is complete?
Installation is complete when the thermostat powers on, connects to Wi-Fi, recognizes your HVAC system, and successfully starts both heating and cooling during a test. If any of those steps fail, review the wiring and setup again.
Conclusion: Finish with a Careful Test
The best way to handle an installation guide for Sensi Lite smart thermostat is to move step by step, with safety and compatibility first. Turn off power, label wires, mount the base carefully, and finish setup in the app before trusting the system. If anything seems uncertain, pause and verify it rather than forcing the install.
For the smoothest result, keep your photos, wire labels, and setup notes handy until the thermostat passes a full heat and cool test. That simple habit can save time and prevent avoidable mistakes.